FIZZY, FERMENTED TEA
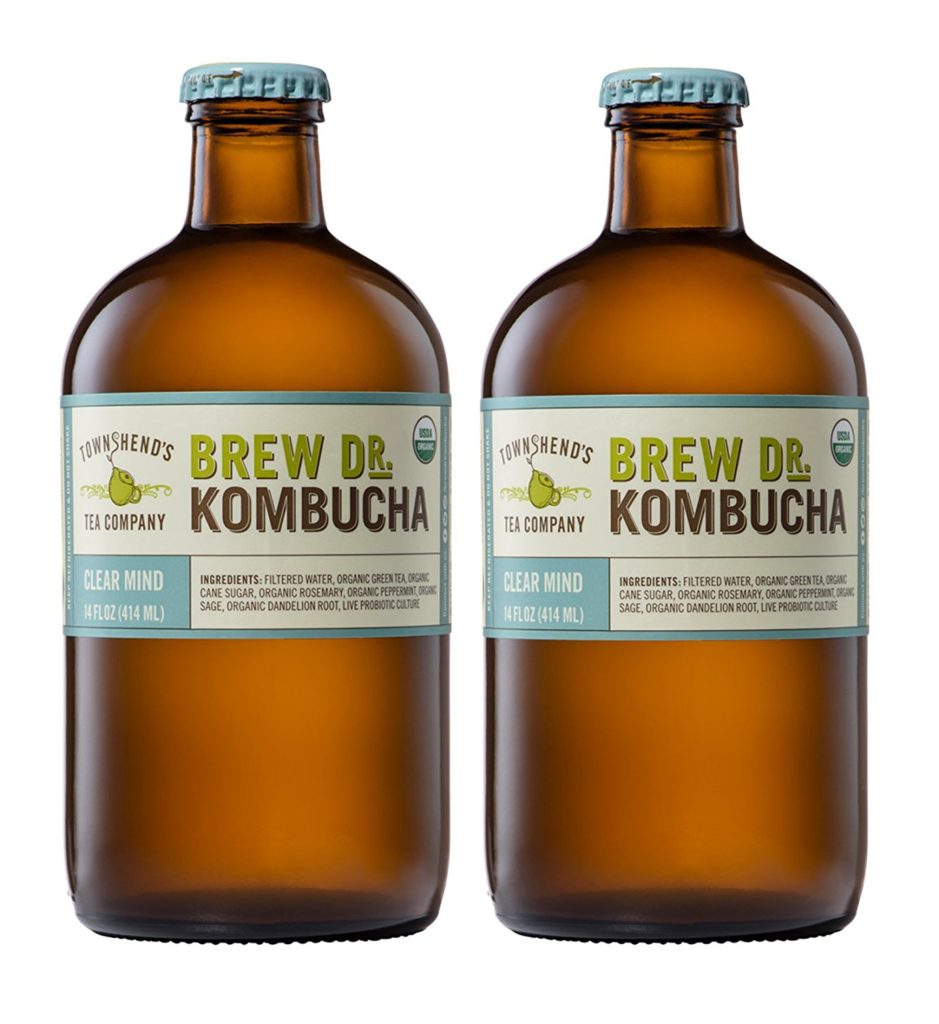
Kombucha is mildly effervescent fermented tea beverage that can be primarily sour or sweet depending on the recipe and length of time left to ferment. Kombucha has recently seen a surge in popularity, similar to other fermented foods like sauerkraut, kimchi, and pickles, thanks to the health benefits associated with consuming them.
Specifically, Kombucha contains probiotics like antioxidants, vitamins, and beneficial acids that contribute to a balanced diet and may assist in improving your immunity and digestive health. It is most commonly made from black tea (although other teas such as green tea can also yield good outcomes) that is steeped, sweetened, then left to ferment with the assistance of a symbiotic culture or bacteria and yeast, affectionately referred to as a SCOBY.
At the store or on draft at a bar, a pint of Kombucha can go for anywhere from $2 to $10 or more, but with your own SCOBY and minimal effort, it is possible to continuously make your own for just pennies at home with this basic black tea Kombucha recipe!

WHAT EXACTLY IS A SCOBY?
The SCOBY is to Kombucha what the “mother” is to vinegar or the starter is to sourdough. In order to ferment tea and turn it Kombucha, you will need a SCOBY as your ferment starter. It is the thing that “does” the fermenting and in the case of Kombucha-making, this happens when the culture eats the sugar in the tea mixture, transforming the tea mixture into Kombucha.
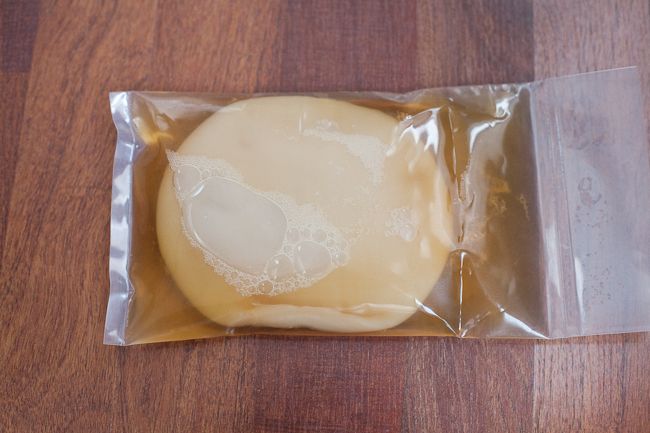
In appearance, the SCOBY is a milky-colored, gelatinous, layered disc that floats in the fermenting tea mixture waiting to become Kombucha. With each new batch, the SCOBY continues to eat the sugar and physically grow. New layers are born while old layers die off and need to be shed and tossed.
If properly tended to, the SCOBY can live for years and continue to be used as a Kombucha ferment starter, providing you and your family with unlimited delicious batches of Kombucha.

WHERE TO GET YOUR OWN SCOBY
Brewing your own Kombucha requires both a SCOBY and some starter tea. There are two ways of acquiring a SCOBY that we recommend to anyone wanting to brew their own Kombucha.
- BORROW ONE: If you have have friends or family brewing their own Kombucha, ask them to divide their existing SCOBY and give you one half plus some starter tea. Depending on the size of the SCOBY, this may require you to half the recipe but general rule of thumb is that a 6 inch wide SCOBY (1/4” to 1/2” thick) + 1 cup of starter tea is good for a gallon recipe.
- BUY ONE: Purchase a hydrated SCOBY packaged with starter tea from a reputable seller. It’s important to remember that the SCOBY is a living thing and you will be ingesting what it comes into contact with so you want to be confident it is safe. We have had great success with this Kombucha Kamp SCOBY and highly recommend them, as do hundreds of other reviewers.
THINGS TO CONSIDER
Kombucha is slightly alcoholic as a result the fermentation of process it undergoes. Typically, the alcohol level is no more than 2% and not sufficient to cause inebriation or mental impairment. Additionally, it is important to know that claims that Kombucha is capable of relieving or treating serious health conditions such as high blood pressure, diabetes, or cancer are not scientifically supported.
In general, the best reasons to consume Kombucha are for its delicious taste and nutritional value and you may want to consult a doctor before serving Kombucha to pregnant women, children, or sick or elderly individuals.

SPECIAL EQUIPMENT
FERMENTATION VESSEL: You have several good options when it comes to choosing a vessel type, but it is extremely important to make sure whatever you choose that it is made of food grade material. What you choose to use depends on your ultimate brewing goals.
For Commercial Batches: Your best bet is a simple, food grade, BPA-free bucket like this one. You can also find ones with a pre-drilled hole in the lid that can be used to make fermented foods with an airlock as well as ones with a spigot that can be used for continuous brew Kombucha and brewing beer.
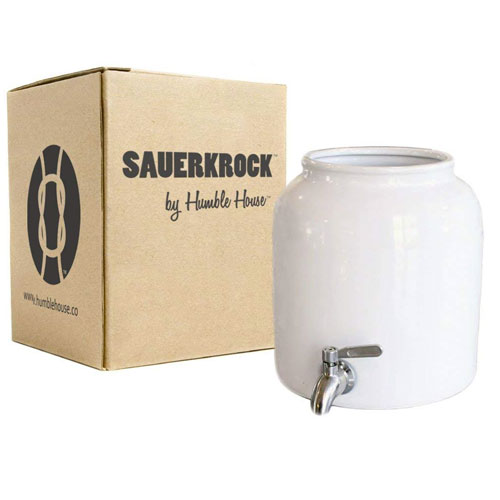
For Individual Batches: We prefer fermentation crocks over glass jars for many reasons which we documented in detail here, although it is possible to use either. We recommend our Sauerkrock “Tap” Fermentation Crock for its versatility as it is suited to make a variety of fermented foods and beverages. If you’re set on using glass, any size food-grade jar will work but a larger size like a half gallon mason jar or a gallon jar will be easier to use.
For Continuous Brewing: Continuous brew is a great option when you want a steady stream of Kombucha, and this can be done using a ceramic crock with a spigot. The spigot simplifies transferring the Kombucha from the crock to bottles for the second ferment and also makes it easy to interchangeably dispense Kombucha and add new tea mixture to make additional batches.
VESSEL COVERING: The vessel opening must be covered in a way that allows the Kombucha to breathe without allowing bugs and dust in. We recommend using a tightly woven, breathable sheath such as paper towel or fabric from a clean T-shirt or bed sheet. We do not recommend cheesecloth as the weave is loose enough for fruit flies to pass through. Secure the covering around the vessel rim with a thick rubber band.
GLASS FLIP-TOP BOTTLES: We recommend amber glass bottles with ceramic flip-top caps like these highly reviewed ones. Amber glass is specifically designed to block out harmful UV rays which is it is so popular for beer and medicine. The ceramic flip-top cap is safer than its plastic peers and allows you to control the pressure that builds up during the carbonating second ferment.
FUNNEL: You will want a funnel to help pour the finished Kombucha into bottles. Any funnel will work, but we especially like these funnels with built in strainers as they help to keep “floaters” that are common in Kombucha-making out of your finished product.
STOCKPOT: Invest in a quality stainless steel stock pot like this one with at least an 8-quart capacity. This basic black tea Kombucha recipe calls for 1 gallon (4 quarts) of water, plus sugar and tea bags, but if you plan on making double or larger batches you will want a larger stockpot.
MEASURING PITCHER: We like large glass measuring cups like these ones by Pyrex which have a whole host of uses beyond fermenting such as for cooking and baking recipe.
HEAT PAD: Optional, but a heater like this one be something you want to consider if the climate where your Kombucha will be fermenting is too cold which can be the case in basements and closets. Kombucha thrives in a warmer environment between 70 and 90 degrees Fahrenheit.
REQUIRED INGREDIENTS
Makes Approximately 4 Liters of Basic Black Tea Kombucha
- Sauerkrock “Tap” = 5 liters (recommended fill is 4 liters)
Ingredients List
- 8 teabags of black tea
- 1 cup of granulated white sugar
- 1 gallon of purified water
- 1 SCOBY (approximately 6″ wide, 1/4” to 1/2” thick)
- 1 cup starter tea*
- Fresh fruit such as blueberries, strawberries, or cherries (optional)
*Liquid from a previous batch of Kombucha that has gone through the first ferment
INSTRUCTIONS
STEEP AND COOL THE TEA MIXTURE
Fill the stockpot with the purified water and bring to a rolling boil. Then, turn the burner off and stir in the sugar. Once the sugar is completely dissolved, add the teabags and allow them to steep until the tea mixture has returned to room temperature, then remove the tea bags.
It is critical that the tea mixture is given time to cool down as extreme heat is not good for the SCOBY and could kill the culture and starter tea. Also, if using your hands to remove the tea bags, make sure your hands are very clean before reaching in to the stockpot. We recommend using a slotted spoon to scoop the bags out or draping tea bags with strings tied together over a wooden spoon for easy removal.
COMBINE ALL INGREDIENTS IN THE CROCK
Once the tea mixture has reached an appropriate temperature, combine the starter tea, the new tea mixture and the SCOBY in your crock. The SCOBY should float near the top of the liquid but if it does not this is not a cause for concern.
Cover the crock with your covering of choice and secure it with a rubber band. If you find that the rubber band and cloth “ride up” simply use two rubber bands – the first one directly around the crock and under the cloth and the second one over the cloth in the same spot as the the first one.
BEGIN THE FIRST FERMENTATION
Move the crock to a low-traffic area of the kitchen that is warm. Kombucha loves a warm environment (over 70, under 90) so near a window where sunlight could heat the jar could be good so long as the vessel you are using is opaque.
UV Rays can negatively impact the ferment, so if you are using a clear container that cannot be near the sun or you just can’t find a good place with a warm climate, you can buy a Kombucha warmer which will regulate the temperature.
Leave the tea mixture to ferment in your crock for 1-2 weeks until you are happy with the taste. The longer you allow it to ferment the more sour it generally gets while a shorter ferment yields a sweeter result. You can taste your fermenting brew throughout the first ferment so long as you careful not to contaminate it. A good way to do this is using a clean stainless steel straw to suction out mixture.

BOTTLE, GARNISH AND BEGIN SECOND FERMENTATION
With a secondary ferment Kombucha transforms from a flat beverage to a carbonated one. When the black tea Kombucha has reached the right flavor for you, transfer it into your flip-top bottles by way of the funnel and strainer combination. The air tight seal during the second ferment is what gives your Kombucha its fizziness.
This is a great time to add additional ingredients to alter the flavor – fruits like crushed blueberries and diced strawberries are very common choices and will sweeten your basic black tea Komucha recipe.
Make sure to leave about 1 inch of head air at the top, then cap the bottles and allow them to sit at room temperature, out of direct sunlight for 1-3 days.
REFRIGERATE AND ENJOY!
When the second fermentation is complete, remove the fruit to prevent it from getting slimy during final shelving. Next? Refrigerate and enjoy! Your basic black tea Kombucha can last for months thanks to the preserving power of fermentation, but usually tastes best in the first several weeks.


Thank you for such a simple recipe! I’ve been wanting to make my own black tea kombucha at home but just haven’t had the courage or the right recipe to make it happen! Thanks so much!
Hi Billy – we’re glad you enjoyed it! We like to keep things simple around here 🙂
If I’m using my Humble House Crock, how do I cover my kombucha batch as it ferments? Do I use the same lid (water rim with the ceramic lid) as I do with my sauerkrauts? Or do I use a cloth and rubber band? Thanks!!
Hi Kirsten,
If you are making Kombucha in a Sauerkrock “Original” or “City” water-sealed fermentation crock, we recommend getting a clean cloth that is large enough so that it drapes over the edges at least 3-4 inches. Then, secure with a thick rubber band just below the upper section of the crock. The upper section of the Sauerkrock is is wider than the the body which keep the rubber band and cloth from riding up. Unlike sauerkraut, Kombucha needs to “breathe” during the fermentation process which is why we suggest a cloth which creates an open fermentation environment while still protecting your brew from contaminants. Paper towel or a bed sheet both work great!
The Humble House Team
If I decide to strain the fruit out of my Kombucha after the second ferment, will the mixture remain fizzy when I pour it back into my bottles or will this decanting kill the fizz? Thank you!
Hi Susan,
Yes, if you did second fermentation and removed the fruit afterwards your kombucha should still be fizzy. Remember to refrigerate and that your batch will taste best the first week or two!
Happy Fermenting,
The Humble House Team
Why doesn’t your Ssauerkrock “tap” have the water sealed lid?
Hi Woozie,
Our SAUERKROCK Tap is open at the top by design. This allows the proper ventilation for the kombucha SCOBY to do it’s work and ferment. The SAUERKROCK TAP is designed with a lip at the top of the crock to keep in place a protective cloth to keep out dirt and harmful bacteria while letting the SCOBY have plenty of air.
If you have any other questions, please do not hesitate to ask!
Happy Fermenting,
The Humble House Team
Thank you for the quick reply!
Hi,
Just received my crock with spigot and am anxious to get started. It arrived so quickly :-). The quality of the container is everything I hoped for, thank you!
I have a few questions.
1) If I wanted to use this crock for a continuous brew, how much do I leave in the crock at all times/ how much can I take out at one time? Or do you think I should bottle everything but what I will need to start a fresh “new” batch?
2) A friend gave me 2 scoby’s and I’m concerned there is not enough starter liquid in the container they gave me to leave one scoby behind. Can I just add sweet tea to the remaining scoby and take all the starter liquid?
Thank you!
Liane
Hi Liane,
We are extremely happy that you are so excited to begin your Kombucha journey!
Per your questions:
1) It is usually recommended to leave about ~30% of the batch in the vessel when making continuous brew Kombucha. You can definitely bottle everything at one time, but then you will be doing Batch Fermentation vs. Continuous fermentation. The SAUERKROCK TAP is primarily designed for Continuous Brew Fermentation. You can still use the SAUERKROCK TAP for batch, but we would recommend using one of our Regular SAUERKROCKs which are better suited for Batch Fermentation. If you do wish to take a break from brewing Kombucha, most folks recommend creating a SCOBY Hotel to properly store your SCOBY.
2) It is recommended to have about 1/2 cup of starter tea per SCOBY. So, depending on how much starter tea you do have, then you may need to put the other SCOBY in a SCOBY Hotel or dehydrate and properly store it. If you are trying to use it now, you will need rehydrate it to activate your 2nd SCOBY.
If you have any other questions, please do not hesitate to ask!
Happy Fermenting!
The Humble House Team
I am completely new to brewing Kombucha. Please give the steps following leaving 30% of the batch in the vessel. Do I start the process again? Can I wait a few days?
thanks for the information and posts
Hi, I am on my first continuous brew. How often do you separate/remove the scoby?
Thank you!
Hello wonderful people! I recently purchased your crock….I’m VERY happy and my first batch of kimchi is fermenting as I type. I just love the quality! I also purchased the spigot crock , followed your really great directions for kombucha, and am drinking as I type! …….I have a question please…..Can I be lazy and pour boiling water directly into the spigot crock with my tea and sugar? …..then let it cool and add my scoby ?
I use one of my son’s old baby bibs. The front side is fabric, but it’s backed with rubber-like material. Works like a charm. An excuse to keep a bib on hand now that he’s studying for his driver’s permit!
This recipe, the in-depth instructions, and equipment will help me finally take the plunge! I adore kombucha and it’s a terrific natural treatment for my IBD. Can’t wait to get started.
I’d like try try the Kombucha. Healthy and refreshing.